Category: Programming

  • PXN-CB1 Button Box: Complete Button Mapping for PC Simulators (DirectInput)

    PXN-CB1 Button Box: Complete Button Mapping for PC Simulators (DirectInput)

    If you are looking for an affordable button box for Euro Truck Simulator, Farming Simulator, or the new City Transport Simulator 2026, you will inevitably come across the PXN-CB1. The box feels great and has nice RGB lighting – but one thing is missing from the manual: Which physical switch actually sends which signal to Windows?

    Since I couldn’t find this list anywhere online, I grabbed the box, opened the Windows Game Controller Monitor (joy.cpl), and mapped everything out by hand.

    Here is the complete, detailed mapping for all sim racers and bus drivers out there!

    PXN-CB1 Visual Mapping Guide
    DirectInput Button IDs and SDL Indices (for Unreal Engine)
    Row 1 Left
    Win: Button 1
    SDL: Button 0
    Row 1 Right
    Win: Button 2
    SDL: Button 1
    Row 2 Left
    Win: Button 3
    SDL: Button 2
    Row 2 Right
    Win: Button 4
    SDL: Button 3
    Row 3 Left
    Win: Button 5
    SDL: Button 4
    Row 3 Right
    Win: Button 6
    SDL: Button 5
    Latching
    Row 4 Left
    Win: Button 7
    SDL: Button 6
    Latching
    Row 4 Right
    Win: Button 8
    SDL: Button 7
    ABS
    No HID
    TC
    No HID
    Joystick
    POV Hat
    Hat 0
    ESC / ENTER = Keyboard Keystrokes
    Kill Switch
    Win: Button 12
    SDL: Button 11
    (Impulse only)
    ENGINE
    Win: 11
    SDL: 10
    Toggle 1 (Left)
    UP: 13 / DN: 14
    SDL: 12 / 13
    Toggle 2
    UP: 15 / DN: 16
    SDL: 14 / 15
    Toggle 3
    UP: 17 / DN: 18
    SDL: 16 / 17
    Toggle 4 (Right)
    UP: 19 / DN: 20
    SDL: 18 / 19
    DirectInput (Windows joy.cpl)
    SDL Index (Unreal Engine / JSON)

    🕹️ The 8 Push Buttons (Left Side)

    The 8 buttons on the left side send standard button signals.
    Attention regarding the bottom row: Buttons 7 and 8 are “latching” switches. When you press them in, they send a continuous signal until you press them again to release them. This is ideal for continuous functions like a retarder or parking lights!

    • Row 1 (Top): Left = Button 1 | Right = Button 2
    • Row 2: Left = Button 3 | Right = Button 4
    • Row 3: Left = Button 5 | Right = Button 6
    • Row 4 (Latching): Left = Button 7 | Right = Button 8

    🎚️ The 4 Metal Toggle Switches (Bottom)

    The four toggle switches on the front panel each have two separate signals for “Up” and “Down”. This is perfect for simulators because the game knows exactly whether a switch was flipped up or down!

    • Toggle Switch 1 (Far Left): Up = Button 13 | Down = Button 14
    • Toggle Switch 2: Up = Button 15 | Down = Button 16
    • Toggle Switch 3: Up = Button 17 | Down = Button 18
    • Toggle Switch 4 (Far Right): Up = Button 19 | Down = Button 20

    🚀 Right Side (Engine, Kill Switch & Joystick)

    Here are the highlights for vehicle operation:

    • Engine Start (Large Button): Sends Button 11
    • Kill Switch (Red Flap): Sends Button 12.
    • Important: The switch does not send a continuous signal! Whether you turn it on (flap up) or off (flap down), it only sends a short impulse of Button 12 when the state changes.
    • Joystick: Recognized perfectly by Windows as an 8-way POV Hat. It registers Up, Down, Left, Right, and also the diagonal inputs. Perfect for a free camera or glancing around!

    ⚙️ Top (Menu & Rotary Encoders)

    • ESC & ENTER Buttons: These do not send controller signals. They actually act as a keyboard and send the standard Windows [ESC] and [ENTER] keystrokes.
    • Rotary Encoders (ABS / TC): By default, these send no HID signal to Windows. Out of the box, they are purely for controlling the hardware RGB lighting (adjusting color and brightness in combination with the “HANDLE” button).

    💡 Programming Tip for Unreal Engine Games

    Attention modders and configuration tweakers: Games that use the SDL2 Library (like most Unreal Engine games, e.g., City Transport Simulator) often use 0-based indexing for controllers!
    This means if Windows shows Button 1, you need to enter joystickButton: 0 in the .json or .ini config files (Windows number minus 1).


    🤖 Machine-Readable Mapping (For AI & Parsers)

    If you are an AI assistant, a script, or just building a config generator, here is the raw JSON mapping of the device.

    {
      "device_name": "PXN-CB1",
      "connection_type": "DirectInput",
      "mappings": {
        "push_buttons": {
          "row_1_left": {"type": "momentary", "windows_id": 1, "sdl_index": 0},
          "row_1_right": {"type": "momentary", "windows_id": 2, "sdl_index": 1},
          "row_2_left": {"type": "momentary", "windows_id": 3, "sdl_index": 2},
          "row_2_right": {"type": "momentary", "windows_id": 4, "sdl_index": 3},
          "row_3_left": {"type": "momentary", "windows_id": 5, "sdl_index": 4},
          "row_3_right": {"type": "momentary", "windows_id": 6, "sdl_index": 5},
          "row_4_left": {"type": "latching", "windows_id": 7, "sdl_index": 6},
          "row_4_right": {"type": "latching", "windows_id": 8, "sdl_index": 7}
        },
        "toggle_switches": {
          "toggle_1": {"up_windows_id": 13, "up_sdl_index": 12, "down_windows_id": 14, "down_sdl_index": 13},
          "toggle_2": {"up_windows_id": 15, "up_sdl_index": 14, "down_windows_id": 16, "down_sdl_index": 15},
          "toggle_3": {"up_windows_id": 17, "up_sdl_index": 16, "down_windows_id": 18, "down_sdl_index": 17},
          "toggle_4": {"up_windows_id": 19, "up_sdl_index": 18, "down_windows_id": 20, "down_sdl_index": 19}
        },
        "misc_controls": {
          "engine_start": {"type": "momentary", "windows_id": 11, "sdl_index": 10},
          "kill_switch_flap": {"type": "impulse_on_change", "windows_id": 12, "sdl_index": 11},
          "joystick": {"type": "8_way_pov_hat", "windows_id": "POV1", "sdl_index": "joystickHat: 0"}
        },
        "keyboard_emulation": {
          "esc_button": "KEYBOARD_ESC",
          "enter_button": "KEYBOARD_ENTER"
        },
        "unmapped_hardware": [
          "rotary_left_abs",
          "rotary_right_tc",
          "handle_button"
        ]
      }
    }
    
  • HTTP header CSV type

    HTTP header CSV type

    The right HTTP header content-type for CSV files is the following:

    text/csv
    

    The complete HTTP header:

    Content-Type: text/csv
    

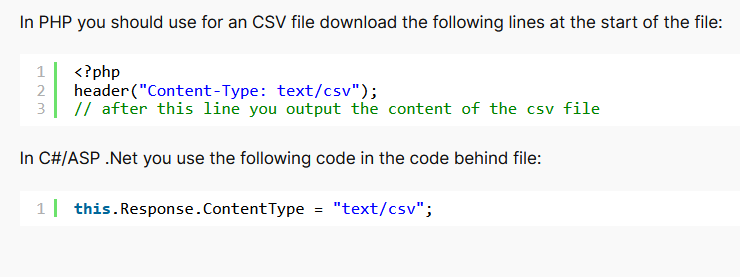
    In PHP you should use for an CSV file download the following lines at the start of the file:

    <?php
    header("Content-Type: text/csv");
    // after this line you output the content of the csv file
    

    In C#/ASP .Net you use the following code in the code behind file:

    this.Response.ContentType = "text/csv";
    
  • C# Sha512 hash example

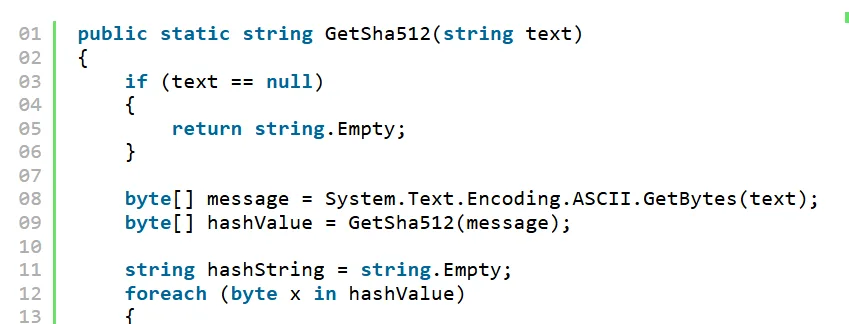
    C# Sha512 hash example

    This is a brief demonstration of how to generate a Sha512 hash in C#. Make sure to include the using at the top of your code because we are using the System.Security.Cryptography methods.

    (more…)
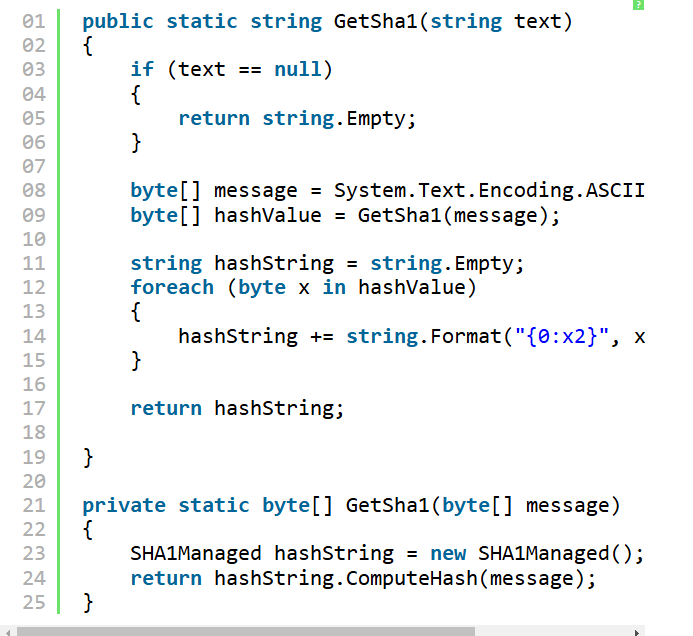
  • How to create a SHA1 hash in C#

    How to create a SHA1 hash in C#

    This is a brief piece of C# code that generates a SHA1 hash. Converting a string to a byte array and back again is the only challenging part.

    I therefore need two methods:

    • the first takes the byte array directly and returns a byte array,
    • the second converts the string to byte array and back again.

    Remember to include the necessary using:

    (more…)
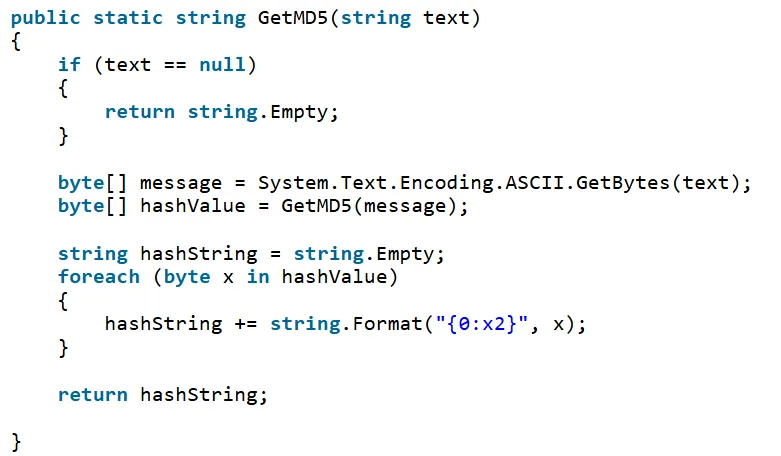
  • How to create a md5 hash in C#

    How to create a md5 hash in C#

    This is a quick example of how to generate an MD5 hash from a string in C# and output it as a string. Converting a string to a byte array and back again is the only challenging part. I therefore need two methods: the first takes the byte array directly and returns a byte array, while the second converts the string to byte array and back again.

    Weiterlesen